How to change a marker in a list. Create a bulleted list in MS Word. Position from text
Creating a list in Microsoft Word is quite simple and just takes a few clicks. In addition, the program allows you not only to create a bulleted or numbered list as you type, but also to convert text that has already been typed into a list.
In this article we will take a closer look at how to make a list in Word.
If you are just planning to print text that needs to be formatted as a bulleted list, follow these steps:
1. Place the cursor at the beginning of the line that should contain the first list item.

2. In a group "Paragraph", which is located in the tab "Home", press the button “Bulleted list”.

3. Enter the first item in the new list, press “ENTER”.

4. Enter all subsequent bullet points by clicking at the end of each one “ENTER”(after a period or semicolon). When you finish entering the last item, press twice “ENTER” or click “ENTER”, and then "BackSpace" to exit bullet list creation mode and continue typing normally.

Converting finished text to a list
Obviously, each item in the future list should be on a separate line. If your text is not already divided into lines, do this:
1. Place the cursor at the end of the word, phrase or sentence that should be the first item in the future list.

2. Click “ENTER”.

3. Repeat the same action for all the following items.

4. Select a piece of text that should become a list.

5. On the quick access panel in the tab "Home" click the button “Bulleted list”(group "Paragraph").

- Advice: If there is no text yet after the bulleted list you created, double-click “ENTER” at the end of the last paragraph or click “ENTER”, and then "BackSpace" to exit list creation mode. Continue typing as usual.

If you need to create a numbered list rather than a bulleted one, click “Numbered list” located in the group "Paragraph" in the tab "Home".

Changing the list level
The created numbered list can be shifted to the left or right, thus changing its “depth” (level).
1. Select the bulleted list you created.

“Bulleted list”.

3. From the drop-down menu, select “Change list level”.

4. Select the level you want to set for the bulleted list you created.

Note: As the level changes, the markings in the list will also change. We will tell you below how to change the style of a bulleted list (the type of bullets, first of all).
A similar action can be performed using keys, and in this case the type of markers will not change.
Note: The red arrow in the screenshot shows the starting tab stop for the bulleted list.

Select the list whose level you want to change and do one of the following:


Note: One keypress (or keys) moves the list one tab stop. The “SHIFT+TAB” combination will only work if the list is at least one tab stop away from the left margin of the page.
Creating a multi-level list
If necessary, you can create a multi-level bulleted list. You can learn more about how to do this from our article.
Change the style of a bulleted list
In addition to the standard marker installed at the beginning of each list item, you can use other characters available in MS Word to mark it.
1. Select the bulleted list you want to change.

2. Click on the arrow located to the right of the button “Bulleted list”.

3. Select the appropriate marker style from the drop-down menu.

4. The markers in the list will be changed.

If for some reason you are not satisfied with the default marker styles, you can use for marking any of the symbols present in the program or a picture that can be added from a computer or downloaded from the Internet.
Today, any person should have computer skills and master at least a minimum set of programs. The standard and most popular include Microsoft Word. When working in Word, users are faced with the need to highlight certain ranges of text for clarity. Very often it is necessary to insert a list into a document. This can be a bulleted list or a numbered one - the user has the opportunity to navigate according to the situation.
The program allows you to create any documents, letters and projects, using ample opportunities for learning all the functions of Microsoft Word, you need to spend time, but the result is worth it.
Lists are necessary to make the text clear and expressive. Numbered and bulleted lists at one level are used in most documents. In dissertations and scientific papers, a multi-level list is used.
Numbering and markers
First of all, you need to select paragraphs that should be formatted as a list. This can be done using the mouse or simply placing the cursor at the beginning of the line from which the list will begin.

In MS Word there is a “Home” tab, in which you can select the desired insert in the “Paragraph” group. The user clicks the “Numbering” or “Markers” buttons, then uses the ruler to set indents. This method is very simple and straightforward, but an inexperienced user may encounter hidden difficulties. When you re-insert bulleted and numbered lists, you will have to edit the indents again.
In the case when it is necessary to format each list separately and change the font parameters, not every user of the program will be able to make the text correct, and moreover, this will require a lot of time and effort.
Numbered lists
Each list element is highlighted with a number, and the numbering is automatically adjusted. To create and edit lists, there is a “Numbering” button in the “Paragraph” group. You can also use the “Numbering” function in the context menu of the selected paragraph.
List options:
- The number format determines which character will appear next to each element.
- The numbering style can be selected depending on the characteristics of a particular document: Arabic or Roman numerals, uppercase or etc.
- The “Start value” field allows you to select the number with which the list will begin.
- In the case when you need to create a similar list, but number it anew, it is convenient to use the “Start a new list” function. You need to select the elements and set all the parameters.
You can insert a numbered list automatically. To do this you need to do the following:
- At the beginning of the paragraph, before entering text, you need to put “1.”, then “Space” or Tab. The paragraph will appear as the first item on the list.
- By prefixing a paragraph with "1)" and then pressing Space or Tab, the user will create a different type of list.
- By analogy, lists with letters are drawn up. In lines you must enter with a dot or parenthesis. After each paragraph you must press Space or Tab.
Create a bulleted list automatically
You can insert a bulleted list in Word as follows:
- At the beginning of a paragraph, you must type an asterisk or greater-than sign, and then press Space or Tab.
- Automatically create a bulleted list. You can enable it by going to the "File" tab and selecting the "Options" group. In the “Spelling” tab, select “AutoCorrect Options.” In the “AutoFormat” section, you need to check the boxes next to styles.
You can create a bulleted list of the following types:

Multi-level list
Bulleted and numbered lists are elements. They should be configured as needed by the user in a particular case. The structure can be edited using the Define Multi-Level List function. It’s convenient to check how all lists are displayed in the “Lists in Documents” group. To change the font settings of each individual font, a multi-level list is associated with paragraph styles.
Key options for setting up a multi-level list

When setting up a list, which consists of several levels, you need to pay attention to the following parameters:
- Selecting a level and an example of its design.
- Defining font settings; if necessary, you can set a constant part of the number.
- Select the type of numbering: symbol, picture, letters and other options.
- Determining the level at which the numbering is updated.
- Define indentation and text placement.
- Additional editing options.
- Matching paragraph style and multi-level list.
Settings that have been created once can be automatically applied to subsequent lists. But if there is a need for editing, you will have to work with each list separately. This inconvenience may seem insignificant, but if there are a large number of lists in the text, formatting will take a lot of time.
How to change the marker style?
By clicking on the “Markers” button, you can select the option that is suitable in this case. To do this, go to the “Library” area and click on it. The type of numbering is selected in the same way: in the “Numbering Library” area.
In order to turn a numbered or bulleted list into text in Word, you just need to press the corresponding button.
Each text element can be highlighted with a special marker. To format the list according to the requirements of a specific document, you must select the “Define new marker” command.

After mastering all the features of Microsoft Word, working with documents will be a pleasure, and you won’t have to spend a lot of time formatting text. A bulleted list, like a numbered one, is included in almost any document and is often used, so it will be useful for the user of the program to become familiar with creating lists of various types.
- Changing the appearance of the standard bullet for numbered lists
- Setting the bullet type for bulleted lists
- Setting an image instead of a bullet for list items
Using HTML tags, you can create two types of lists that have bullets: numbered and bulleted. By default, most browsers display bulleted list markers as a circle and numbered list markers as numbers in order. CSS provides the ability to change the appearance of standard markers. Next, we will demonstrate examples with different types of markers, with the help of which you can change the appearance of your lists.
Editing and deleting markers
To change the default appearance of a marker in CSS, use the list-style-type property; the value is set to the type of marker you want to replace the standard with.
An example demonstrating some types of bullets for numbered lists:
CSS Property:
list-style-type:
Result:
- Click on the list-style-type property value
- Watch the markers change
- Use the most appropriate bullets for your lists
Ol#myList (
list-style-type: decimal ;
}
Click on any property value to see the result
For bulleted lists, there are only three types of markers, which can be specified using the circle, disk and squred values:
- Coffee
- Tea
- Coffee
- Tea
- Coffee
- Tea
Using the none value, you can remove markers from items in the list, but the left indentation will still remain:
- Coffee
- Tea
- Coffee
- Tea
Replacing markers with pictures
If none of the default markers suits you, then CSS provides the ability to replace them with any image; the list-style-image property will help you with this, in the value of which you need to specify the path to the selected image.
Take into account the fact that the image will not automatically scale to fit the list and will be displayed at its own size, so you will have to select an image that is suitable in size or edit an existing one, reducing or enlarging it to the desired size:
- Coffee
- Tea
- Coffee
- Tea
List indentation
When you remove bullets from list items, you can also remove or reduce the browser's default left padding size. To completely remove the padding, you will need to use the padding-left property, which allows you to adjust the padding:
- Coffee
- Tea
- Coffee
- Tea
In the example, we completely removed the indentation on the left side, so the list items now fit flush to the edge of the browser window. And as you can see from the example, the bulleted list is displayed exactly as intended, but the markers are missing in the numbered list. The reason lies in the markers themselves - by default, markers are not part of the content of list items, so if you remove the left indentation they do not move along with the contents of the elements
The list-style-position property specifies whether the bullet should be positioned inside or outside the list items. This property can take two values:
- outside - the marker is located to the left of the content (this is the default)
- inside - the marker is located inside the list item along with the content
Now you can rewrite the previous example so that the indentation on the left side is removed, but the markers do not go off the edge of the browser:
- Coffee
- Tea
- Coffee
- Tea
- Coffee
- Tea
In the example, a border was added to each list item to visually show the boundaries of the list items.
CSS lists— a set of properties responsible for the design of lists. Using HTML lists is very common when creating website navigation bars. List items represent a collection of block elements.
Using standard CSS properties you can change the appearance of the list marker, add an image for the marker, and change marker location. The height of the marker block can be set with the line-height property.
Designing lists using CSS styles
1. List marker type list-style-type
The property changes the marker type or removes the marker for bulleted and numbered lists. Inherited.
| list-style-type | |
|---|---|
| Values: | |
| disc | Default value. A filled circle acts as a marker for list items. |
| Armenian | Traditional Armenian numbering. |
| circle | An open circle acts as a marker. |
| cjk-ideographic | Ideographic numbering. |
| decimal | 1, 2, 3, 4, 5, … |
| decimal-leading-zero | 01, 02, 03, 04, 05, … |
| georgian | Traditional Georgian numbering. |
| hebrew | Traditional Hebrew numbering. |
| hiragana | Japanese numbering: a, i, u, e, o, … |
| hiragana-iroha | Japanese numbering: i, ro, ha, ni, ho, … |
| katakana | Japanese numbering: A, I, U, E, O, … |
| katakana-iroha | Japanese numbering: I, RO, HA, NI, HO, … |
| lower-alpha | a, b, c, d, e, … |
| lower-greek | Lowercase characters of the Greek alphabet. |
| lower-latin | a, b, c, d, e, … |
| lower-roman | i, ii, iii, iv, v, … |
| none | There is no marker. |
| square | A filled or unfilled square acts as a marker. |
| upper-alpha | A, B, C, D, E, … |
| upper-latin | A, B, C, D, E, … |
| upper-novel | I, II, III, IV, V, … |
| initial | Sets the property value to the default value. |
| inherit | Inherits the property value from the parent element. |
Syntax
Ul (list-style-type: none;) ul (list-style-type: square;) ol (list-style-type: none;) ol (list-style-type: lower-alpha;)  Rice. 1. Example of designing bulleted and numbered lists
2. Images for list items list-style-image
You can use images and gradient fills as list item markers. Inherited.
Syntax
Ul (list-style-image: url("images/romb.png");) ul (list-style-image: linear-gradient(#FF7A2F 0, #FF7A2F 50%, #FFB214 50%);) 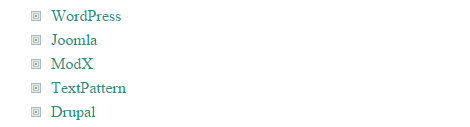 Rice. 2. Design a bulleted list using an image
 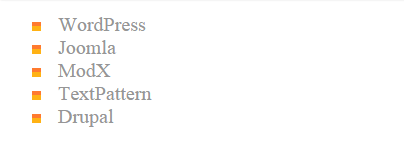 Rice. 3. Design a bulleted list using a gradient
3. List-style-position
This property provides the ability to place the marker outside or inside the content of the list item. Inherited.
Today we'll figure out how lists are created on a web page, what markers are used, and test different styles to change the appearance.
Let me remind you how styles are connected to an HTML page:
There are bulleted or unordered list css and numbered.
List markers are images of different shapes: circles, squares, jackdaws and the like. They are also called bullets. You can also use your own drawings as markers for the list.
Numbered list represents the output of information numbered 1, 2, 3, etc.
Typically, markers are simple black circles, which is familiar to the user, but on the other hand, they do not attract much attention to the text.
If you decide to replace these mugs with designer ones, then you need to master styling a list using css. That's what we'll do today.
The basis of any list consists of the following web page code:
- First element of the list
- Second list element
- Last element of the list
This block looks like this:
- First element of the list
- Second list element
- Last element of the list
Css styling of list markers
We will write the external output in the styles file style.css. It may be called differently, but have a .css extension.
Standard CSS markers: circle (circle) - unfilled circle, point (disk) - filled circle, square (square) - filled square.
Generates a list in css code ul- with its help we set which of the standard markers will be displayed on the page.
For example, let's display lists using a circle. The entry in the css file will be like this:
Ul (list-style-type: circle)
But often it is necessary to replace markers not in all displayed lists, but only in certain blocks. For example, change in posts, but not in comments. In this case, the ul code should not have any meaning, and the circle style should be specified only for lists in posts. This is what the code looks like without the value:
Ul (list-style-type: none)
If you cannot find the code in the css file that is responsible for displaying the list in the block you need, then use the plugin for Firefox - Firebug or in Google Chrom, right-click on the blog web page. Then “view element code”.
For example, one of the options for changing the appearance of the list in posts to a standard circle, if there is no content for the block ul:
Post-content ul (list-style-type: circle)
Or another example:
#content-blok ul(list-style-type:square)
Complete course “Css practice”
]]> ]]>
Knowledge of CSS is necessary for every webmaster, because it is a universal way to make high-quality design without overloading the page code.
For those who want learn css styling tricks very quickly, ]]> recommend ]]> advanced course "CSS practice" by Evgeniy Popov.
Next articles:
Graphic markers for the list.
List indent css.
How to change the css color of a list marker so that its color is different from the text color.
Nested lists. How to make a horizontal list in css. Change the style of numbered lists.
Download beautiful markers for site lists.